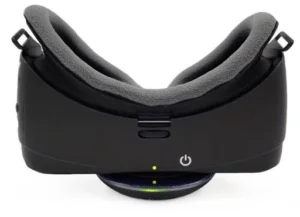
If you are seeing double, first attempt to use the Focus wheel to refocus. If you continue to experience double vision, your IPD setting could have been changed. The default IPD setting on the IrisVision should be 60. To check your IPD settings:
Voice prompts may be turned off or the volume is off. Follow these steps:
Press and hold the white button on the top of the headset for about 7 seconds. You will hear 4 beeps to confirm that the headset is about to power off (this may take up to 10 seconds). The screen will turn black and the IrisVision will power off.
4.0 Live:
You may also power off your IrisVision using the voice commands. Double tap the touchpad, listen for the beep, and then say “Shut down” or “Turn off”.
3.0 Live:
You may also power off your IrisVision using the voice commands. For devices with Google Assistant say “Okay Google. Shut Down”, or double tap the touchpad, listen for the beep, and then say “Shut Down”.
If you are unable to power down the IrisVision using these options, please contact IrisVision Customer Support by phone toll-free at +1-855-207-6665 (Monday through Friday, 7:00 a.m.- 6:00 p.m., PST) or by e-mail at Support@IrisVision.com.
The IrisVision does not respond to headset controls. For example, the IrisVision will not move past the Focus screen.
When the IrisVision does not respond to the headset, the Display Unit may not be inserted into the headset properly. Follow these steps:
Are voice prompts off when you change modes?
You must be wearing the headset. To turn off (disable) voice prompts, press the Mode button until you see the Focus screen. Press on the touchpad for 15 seconds. You will hear “Speech prompt disabled”. Follow the same process to turn on (enable) voice prompts.
4.0 Live:
S9 and S10 devices: You can turn voice prompts off and on by double tapping the touchpad. Listen for the beep and say “Turn on voice”, “Turn off voice”, “Enable voice”, or “Disable voice”.
3.0 Live:
S7 and S8 devices: You can turn voice prompts off and on by double tapping the touchpad. Listen for the beep and say “Enable voice prompts” or “Disable voice prompts”.
For S8 devices with Google assistant setup, say “Okay Google”, listen for the beep, and then say “Enable voice prompts” or “Disable voice prompts”.
1. Insert the Display Unit into the headset by matching the yellow dots as shown below.

2. Securely lock the Display Unit into the headset by pushing the Display Unit against the spring lock, as shown below.

NOTE: When the Display Unit is connected correctly to the headset, it will say “Device inserted correctly.” If there is no verbal confirmation, the Display Unit is not connected correctly and the headset controls will not work. Ensure that the device speaks before you close it securely into the headset.
If you have any software issues not listed in the FAQ, please make sure your IrisVision is connected to Wi-Fi and call IrisVision Customer Support toll-free at +1-855-207-6665 (Monday through Friday, 7:00 a.m. – 6:00 p.m. PST).
Please call us at +1-855-449-4536 to schedule your first remote one-on-one coaching session from the safety and comfort of your own home. Your IrisVision will be activated during this session.
Wi-Fi is not necessary for using most features, but it is highly recommended for using media features such as the video player, advanced OCR, and Alexa voice assistant.
Additionally, Wi-Fi is recommended for remote support and software updates.
For those without access to Wi-Fi, IrisVision now offers an extended Data Usage Plan. For $20 a month* use up to 500MB of data to stream and save YouTube videos, use Amazon Alexa smart commands, and easily connect with our Support Team. You will not be able to access YouTube videos or use Amazon Alexa without WiFi. All the other features and benefits will work without WiFi
Note: IrisVision offers up to 500MB of complementary data usage until you have connected your device to Wi-Fi. SIM cards will deactivate after 500MB of data usage or 60 days of use with no optional data plan purchased.
Your IrisVision will take approximately 5 hours to fully charge and will automatically return to Focus mode when powered on.
NOTES:
The screen will turn black few minutes after you set the headset on the charger. When the Display Unit is fully charged, the red light on the charging pad changes to green and you will hear a verbal prompt, “Charging completed” (if voice prompts are enabled).
While the headset is charging, the charging pad will emit a solid red light (circled).

When the headset is fully charged, the charging pad will emit a solid green light (circled).

If the red light is not on or if it is flashing, the headset is not charging. Please remove your headset and reposition it until the light remains solid red.
The IrisVision’s battery lasts 3 hours. It can last 3+ hours without continuous use, and all day (8 to 10 hours) on standby. You can make the most of this time by powering the headset off when you are not using it.